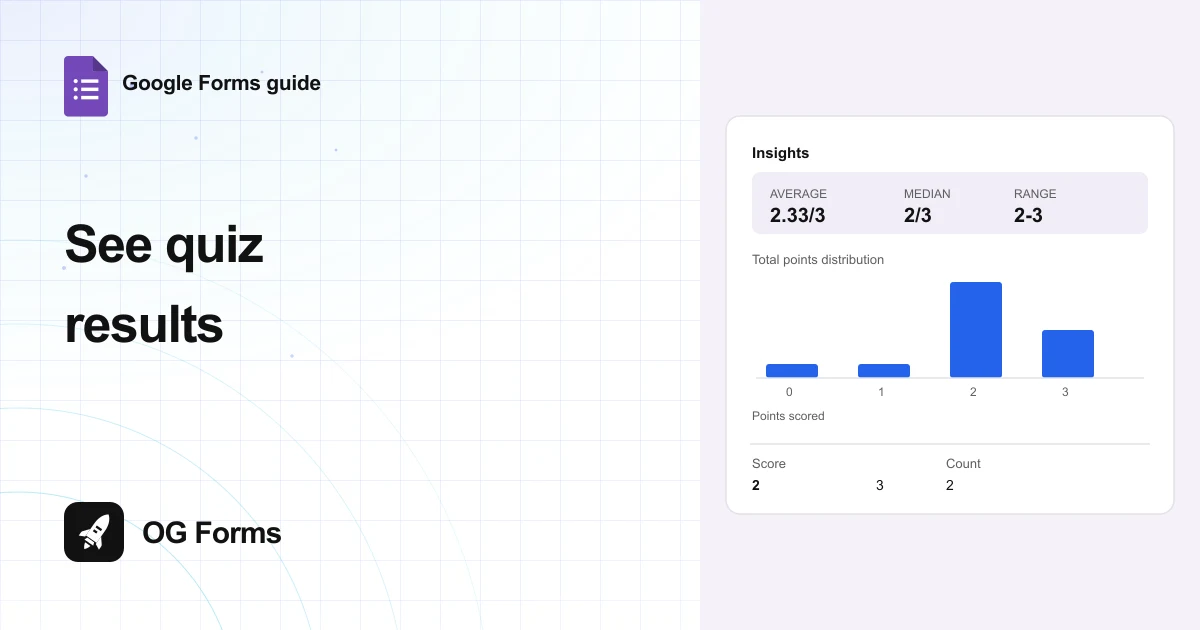
See quiz results in the Responses tab of the quiz: Summary adds an Insights block with the average, median and range, and Individual shows one respondent's score with each answer marked right or wrong. Release the scores from the same tab when you are ready.
A quiz is still a form, so the answers live where every answer lives. What changes is that the Responses tab starts scoring them, and it adds a release control that a plain form does not have.
Two things decide what everyone sees: the score summary you read as the owner, and the release settings that decide what a respondent sees of their own marks.
I read the results of a three question quiz with three responses in November 2026, and the scores CSV below is copied from that download.
If marking is the part you dread, a Google Forms alternative is the honest route, because the product stops at a score and a count.
Step 1: Open the Responses tab
A quiz keeps the count in the same place, and adds a total points figure to the header.
- Open the quiz in the editor. The header shows Total points beside the tabs.
- Click Responses. The badge on the tab shows how many submissions you have.
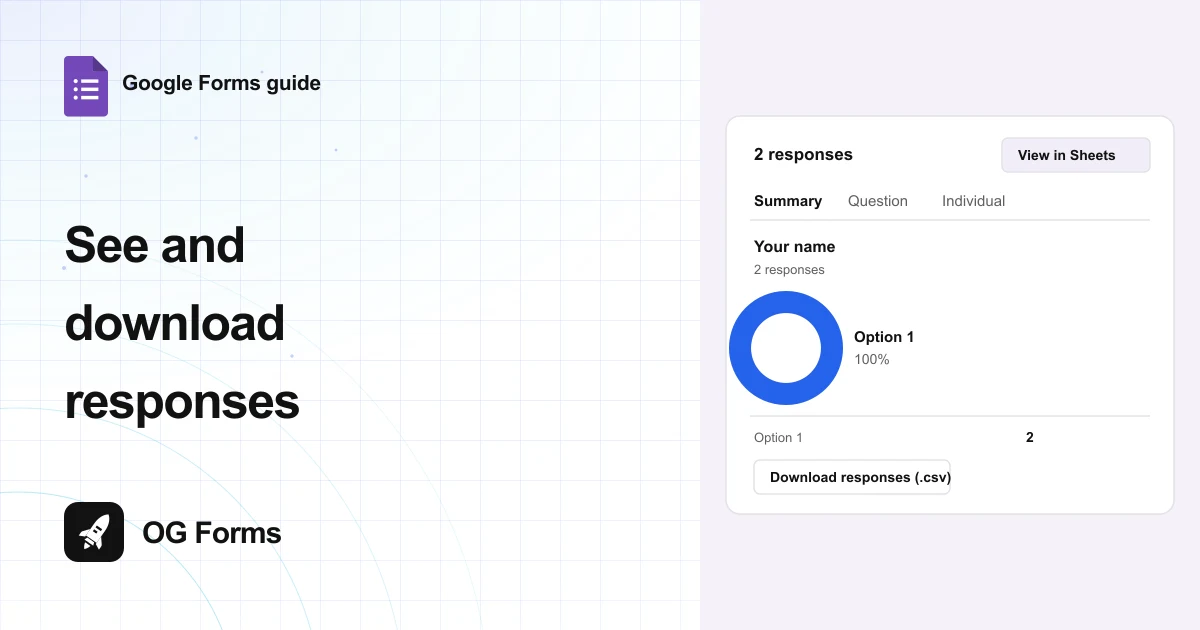
- Use the three views: Summary, Question, Individual.
- Read the count line, for example 3 responses, above the views.
The header total is the sum of every question's points, so a three point quiz with three questions is three questions worth one point each unless you changed them.
Step 2: Read the score summary
Summary is where you find out whether the quiz worked, before you look at anyone by name.
- Read the Insights block first: Average, Median and Range, all in points out of the total.
- Look at the Total points distribution chart to see how the class spread across the scores.
- Read the Score and Count table under it, which is the same data as numbers.
- Scroll to each question to see how many got it right, for example 2 / 3 correct responses.
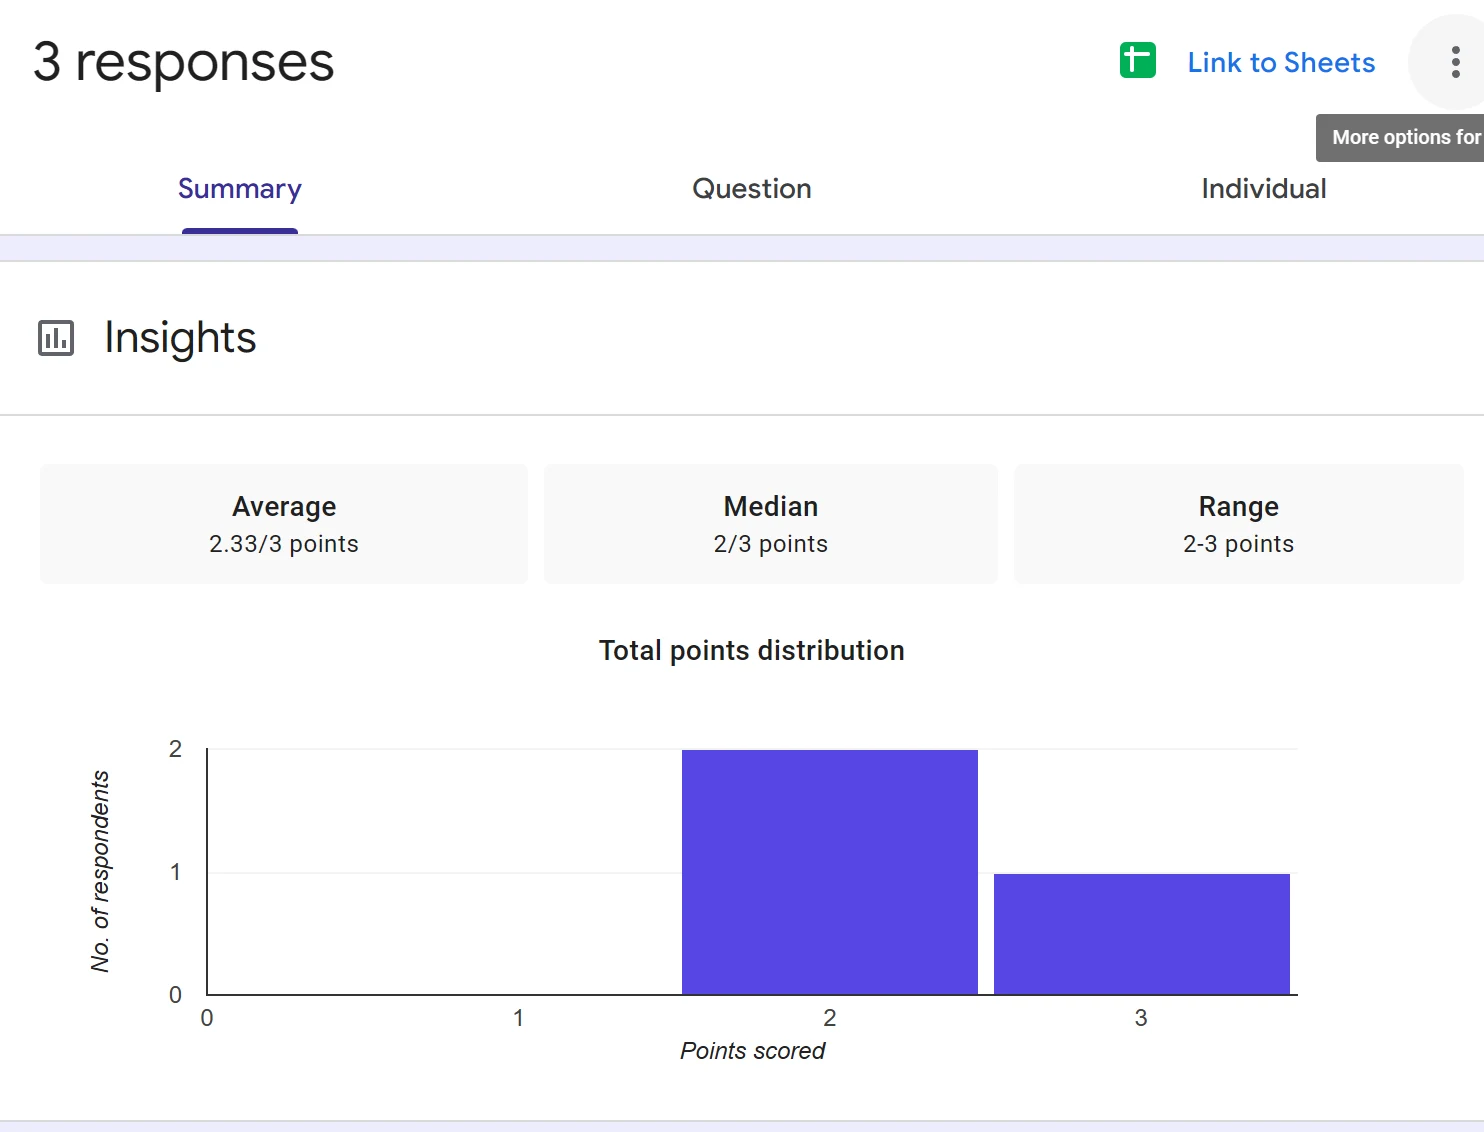
Each question block marks the correct options with a tick, so a wrong answer key shows up here as a suspicious count rather than as a wrong mark on one person.
Step 3: Read one person's marked answers
Individual is the view you want when someone asks why they lost a mark.
- Click Individual, then pick the response from the list at the top or step through with the arrows.
- Read the score line at the top, for example 2 of 3 points, and the release line under it.
- Read each question with its points, for example / 1, and the answer marked right or wrong.
- Look under a wrong answer for Correct answer and the Feedback you wrote when you set the key.
- Click Add individual feedback to leave a note on that question for that respondent.
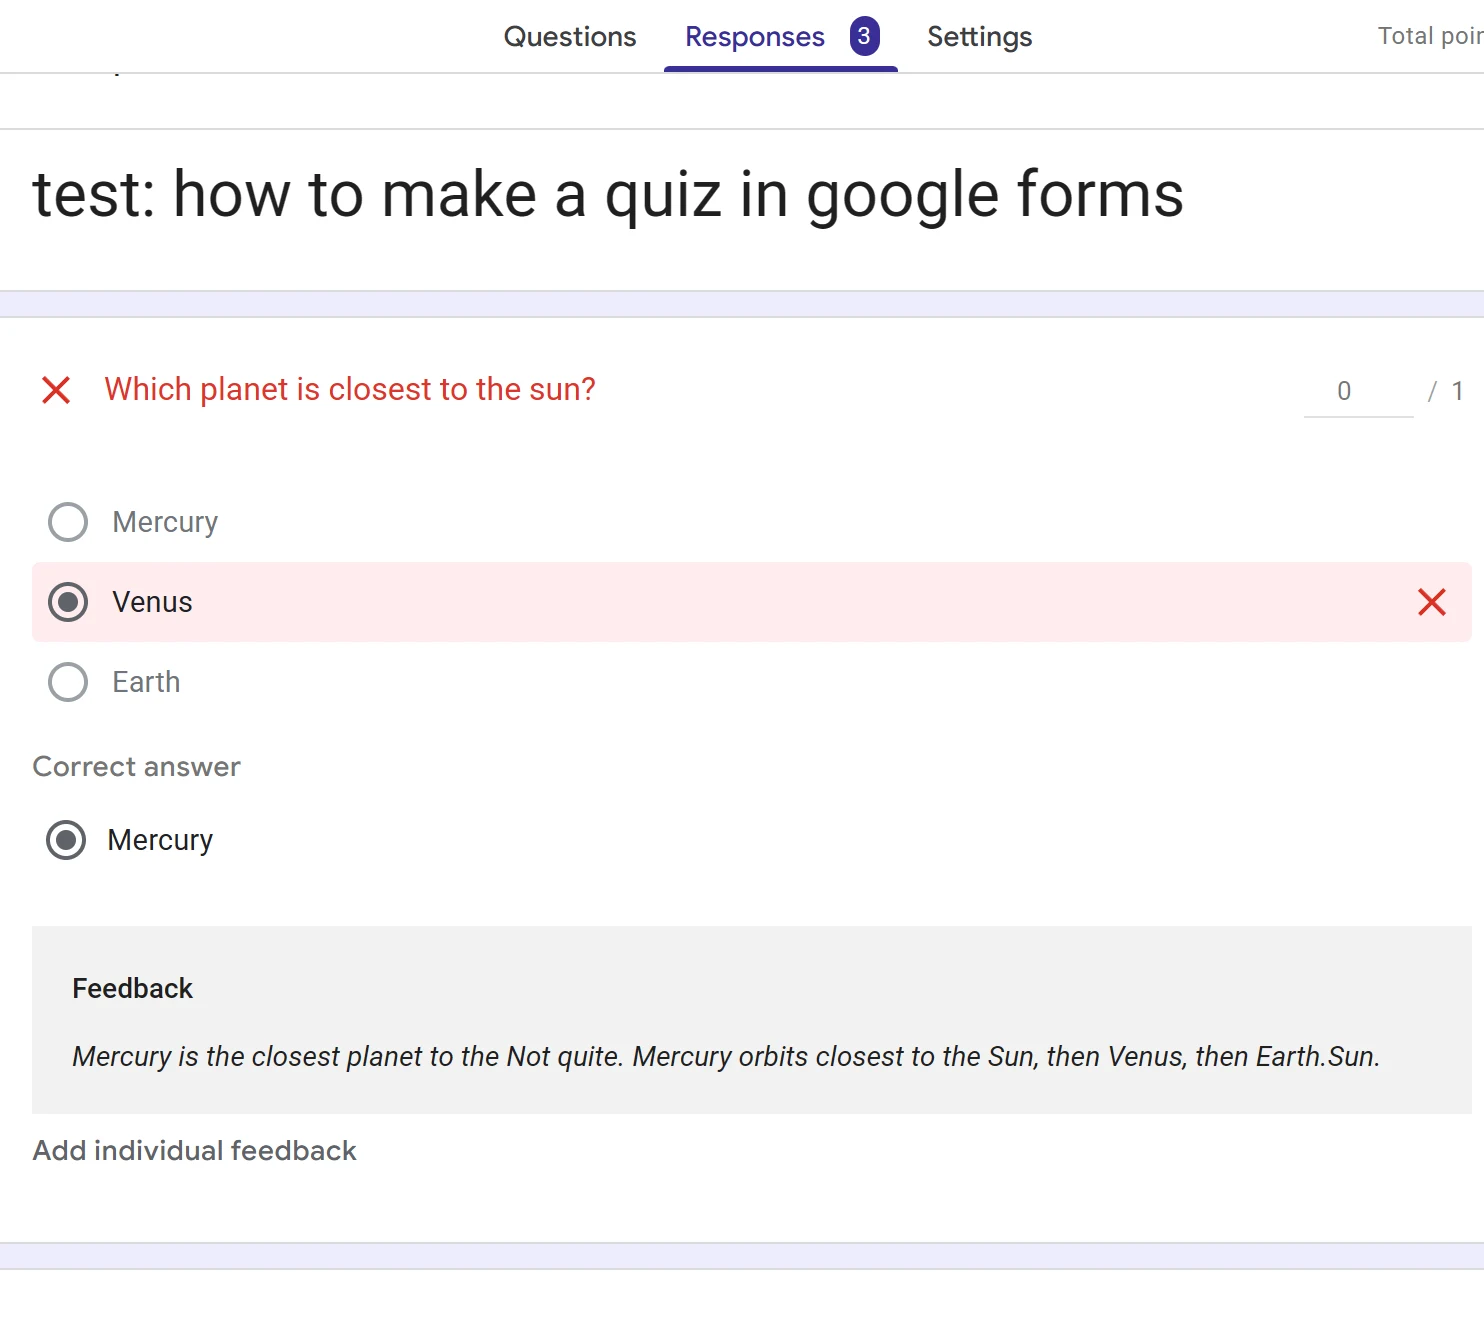
The feedback line is the part worth setting up in advance. It appears under the question for anyone who missed it, without you writing the same explanation three times.
Step 4: Release the scores
Marks stay invisible to respondents until you release them, which is the setting people miss.
- Stay on Summary and find the Scores section, with a Release scores button above the list.
- Click Release scores. A dialog opens with Message (optional) and a list of respondents.
- Tick All respondents, or tick the individuals you want to email.
- Click SEND EMAILS AND RELEASE.
- To automate it, open Settings, Make this a quiz, and set RELEASE MARKS to Immediately after each submission.
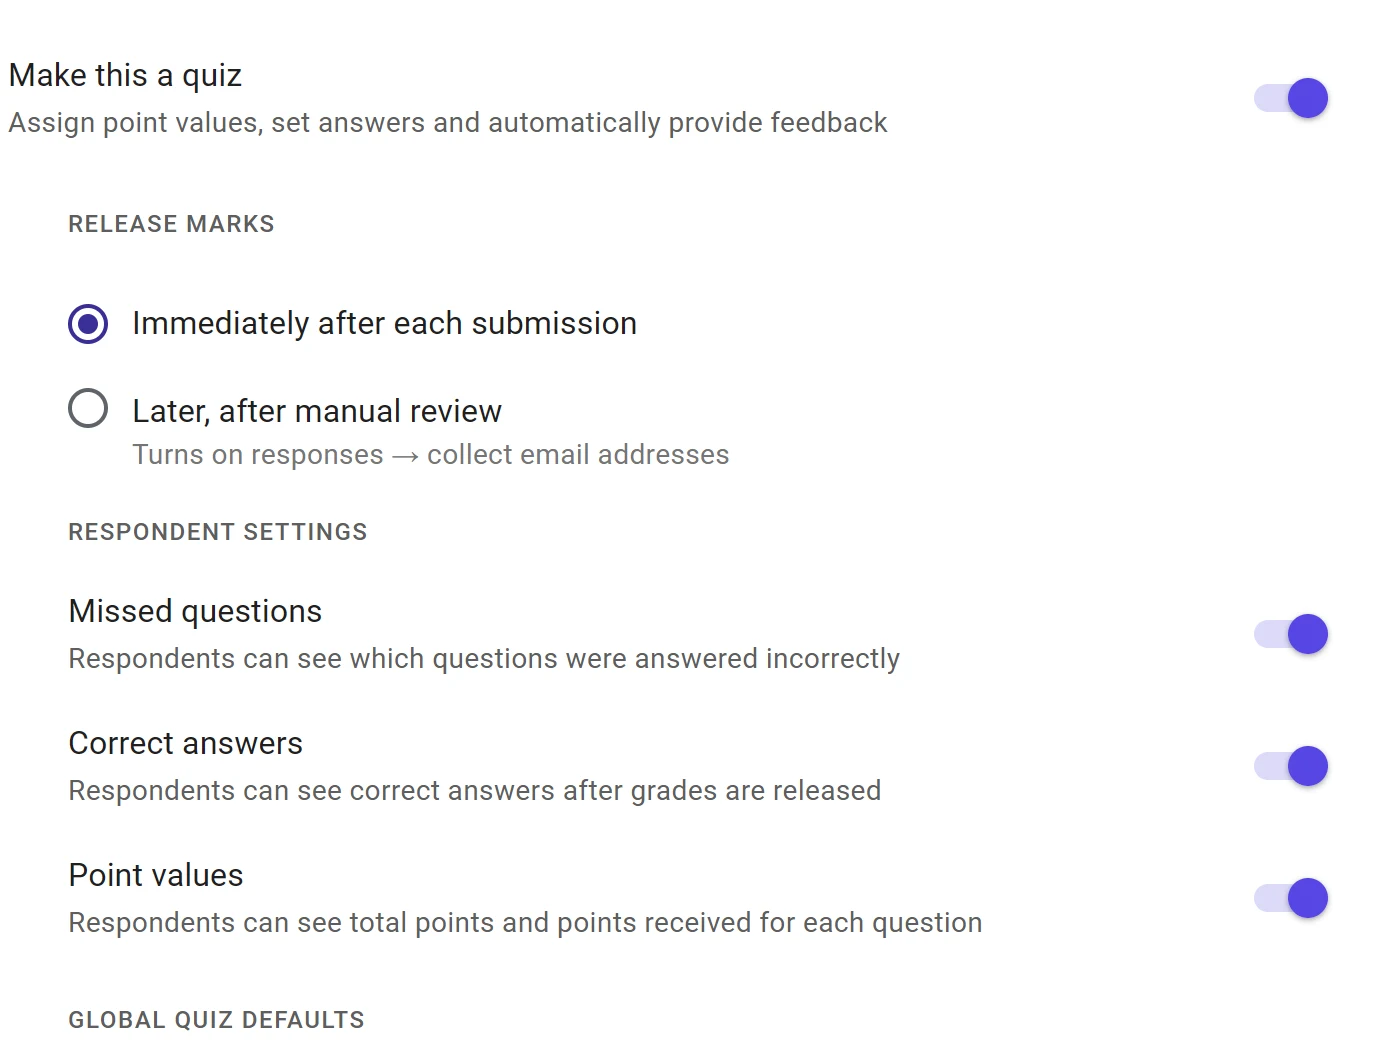
The dialog sends email, so it is not a quiet toggle. Under it, RESPONDENT SETTINGS decides how much of the marking they see: Missed questions, Correct answers and Point values each have their own switch.
Step 5: Download the scores
The quiz export is not the same file as a normal form export. It carries the marking.
- On the Responses tab, open the three dot menu at the right of the panel.
- Choose Download responses (.csv). The file arrives as a zip.
- Unzip it and open the CSV. A quiz export has extra columns.
This is the header row from a three question quiz, exactly as downloaded:
| Column | What it holds |
|---|---|
| Timestamp | When it was submitted |
| Username | The email, when the quiz collects addresses |
| Total score | For example 2.00 / 3 |
| Question title | The answer, with checkboxes written as 2;7 |
| Question title [Score] | Points for that question, for example 0.00 / 1 |
| Question title [Feedback] | The feedback text, when the answer was wrong |
One trap the menu does not warn you about. The zip is named after the form with the colon swapped for an underscore, but the CSV inside keeps the colon.
On Windows, a form called test: how to make a quiz fails to extract with a message about an invalid archive entry. Rename the form before you export, or extract with a tool that allows the character.
Why can I not see a score?
Four causes, in the order worth checking.
| What you see | Why | Fix |
|---|---|---|
| Answers with no marks anywhere | The form is not set up as a quiz | Turn on Make this a quiz in Settings |
| A respondent says they never got a score | Marks are released manually by default | Release scores, or set Release marks to immediately |
| Everyone lost the same question | The answer key for that question is wrong or empty | Open the question, check the Answer key, and fix it |
| The download will not unzip on Windows | The CSV inside keeps a colon from the form title | Rename the form and export again |
What Google Forms cannot do with quiz results
We build OG Forms, so weigh this part with that in mind.
- No free-text marking. A short answer is scored against the key, so a long answer needs a person to read it.
- No per-student page. Google gives a respondent their score and whichever switches you left on, not a page they can come back to.
- One summary block. Average, median, range and a distribution. Nothing compares two questions or tracks a group over time.
- A fixed export. The CSV carries the columns Google chooses, and the release dialog is the only way to send results out.
If marking is the job rather than the form, OG Forms reads answers back in plain language instead of a score chart. Compare what OG Forms does with responses, or start from a form template built for the job.
For a class test under a hundred submissions, the quiz plus the CSV is enough. Start a form in OG Forms when the answers need reading rather than counting.
FAQ
How do I see quiz results in Google Forms?
Open the quiz and click Responses. Summary shows the Insights block with average, median and range, and Individual shows one respondent's score with each answer marked.
How do I see one student's score?
Click Individual on the Responses tab, pick the response from the list at the top, and read the score line, for example 2 of 3 points.
How do I release scores to students?
On Summary, click Release scores, tick All respondents, then click SEND EMAILS AND RELEASE. To do it automatically, set Release marks to Immediately after each submission in Settings.
Can students see their scores automatically?
Only if you set Release marks to Immediately after each submission, and only as much as the Missed questions, Correct answers and Point values switches allow.
Does the CSV include the scores?
Yes. A quiz export adds Username, Total score, and a [Score] and [Feedback] column for every question, alongside the answers.
Why will the download not unzip?
The CSV inside the zip keeps a colon from the form title, which Windows will not extract. Rename the form before exporting, or use a tool that allows the character.
What's next
If the answers need to be worked on rather than scored, how to see and download responses walks through the three views and the plain CSV.
If the quiz is not marking at all yet, how to make a quiz in Google Forms covers the answer key and the point values.